
Sunburst Mirror

There are a lot of ways to dress up that big space above your headboard. My current favorite is an oversized sunburst mirror. You could always buy one made of metal, but since this is hung over my headboard, I prefer something light. It costs much less and is easy to make! You'll want one about 40" wide to really make a statement above a queen size bed.

Materials


1. Small round framed mirror 10" wide (available here)
2. (20) 48" long dowels 1/4" thick
3. Assorted sizes of mirror tiles (available at Michaels)
4. Hot glue gun or heavy duty glue
5. Rustoleum Gold Metallic spray paint 

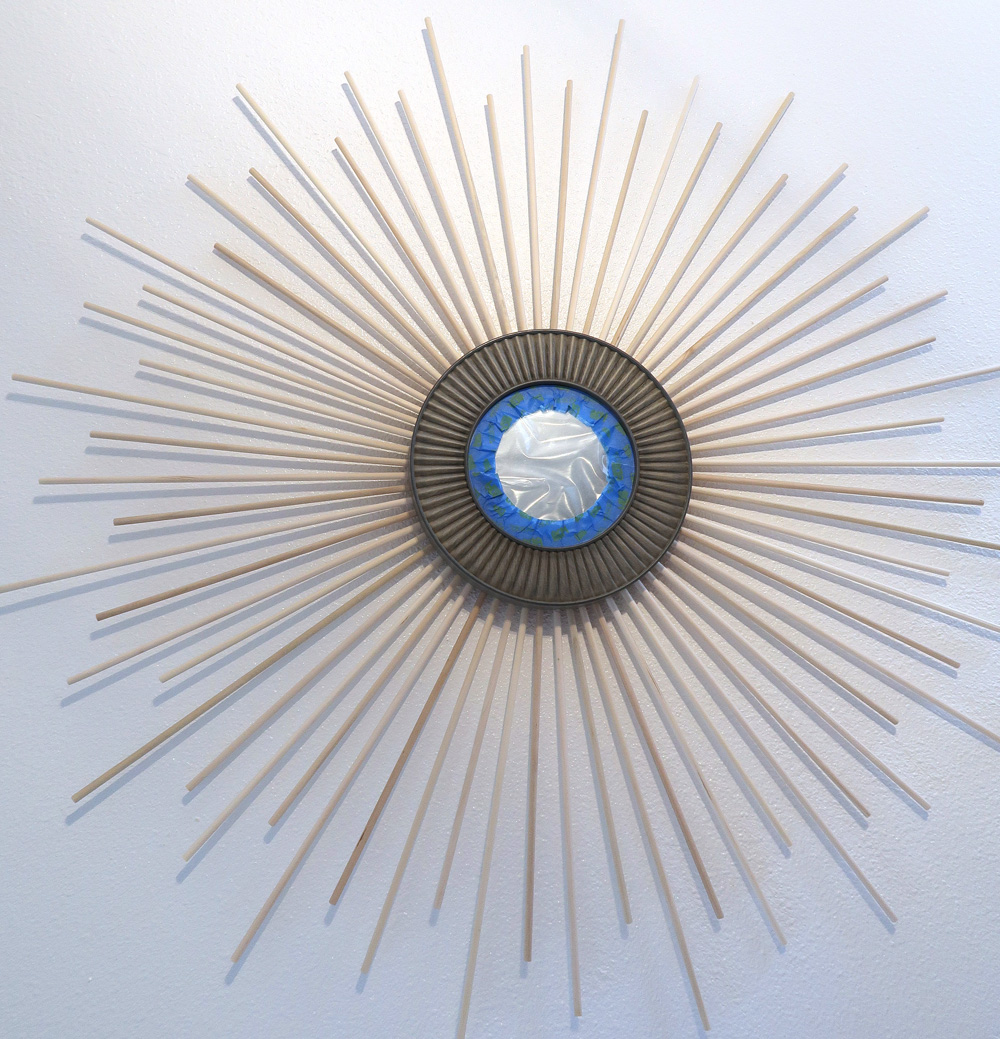
You can try different arrangements with the dowels to see what you like. For mine, I cut sticks that were 10", 11", 12.5", and 14" long. Sixteen pieces each. I then hot-glued them to the back of the mirror. This particular mirror had hanging hardware on the back so I had to cut three sticks even shorter to fit around it. I then taped off the front of the mirror to prepare for painting.

 After one coat of paint, the mirror is starting to come together. Definitely put the mirror on something like a paint can before you paint, or you will have a hell of a time getting to the underside of the mirror. For a faster paint job, I placed the mirror face up, sprayed the entire front face, then sprayed the underside of each dowel without moving the mirror. You really have to be careful that you get every spot covered on the dowels, especially the ends and where they meet the mirror. 

Lastly, I glued the mirror tiles on and hung the finished mirror up. I love the look! By the way, I don't swear by spray paint at all, but this metallic Rustoleum looks great. From a few feet away, you would never think the rods are made of wood.

Comments

Popular posts from this blog

Magazine Holder

I remember back in the day when these  leather sling-type magazine holders  were in style. Nowadays I can't find anything comparable in quality at a good price, so I designed and made this solid wood one. The size of this is a little large for just magazines because I planned for it to hold more than that, but you can adjust the dimensions so that it resembles a traditional holder. The one above measures 21" x 12" x 10". Materials 1. (1) 48 in. deck baluster (I chose redwood.) 2. (3) 48 in. long dowels 5/8" diameter 3. 120 grit sandpaper 4. Titebond or other wood glue 5. Polycrylic and paintbrush (wood stain optional) 6. Medium duty utility fabric (I used duck canvas.) Tools: Wood saw and sewing machine All of these materials are pretty inexpensive and available at Lowe's, Home Depot, and Jo-ann Fabrics. Cut the baluster into 4 pieces, each 10" long. Here I use a hacksaw for a cleaner cut. Sand the ends of eac

Woven Paper Hot Air Balloons

Make these whimsical hot air balloons and hang them up for parties or in a nursery. You can find a ton of different art papers at craft stores and make interesting combinations. It's such a fun project to do! Let me know how yours turns out!

Bathroom Makeover with BM Advance

Today I'm going to share my experience redoing the bathroom cabinets with one of the most popular door and trim paints, Benjamin Moore Advance. There are many mixed reviews on this paint but as far as low odor, waterborne alkyds go, I don't think there's anything better at its price point. Loved the result!  This is the before: (so excited to paint I already took off some doors 😄)   BM Advance  Color :  Kelly Moore Country Cotton, a match for the existing trim. Sheen :  Semi-gloss. After having painted other cabinets in Satin, I have to say that unless you're sure you like the extra shine of semi-gloss, stick with satin. It's just the right amount of shine for most people.  Before getting to the fun part, surface preparation is a must!  I cleaned each door with diluted vinegar, deglossed with Klean Strip, then sanded with 120 grit, and then 220 grit. Since I also was replacing the hinges, I filled in the old holes with Elmer's wood putty